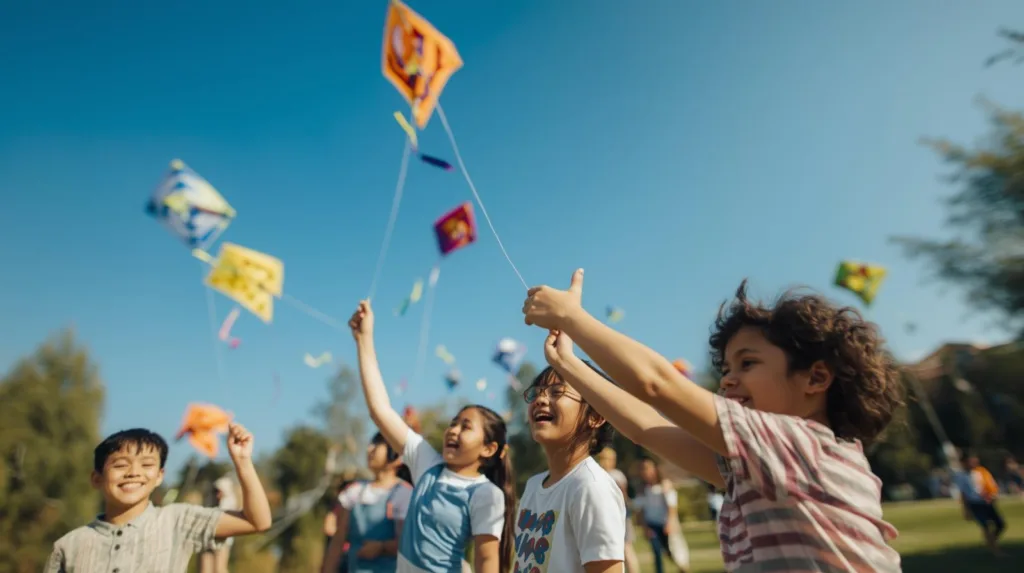
Few crafts capture the spirit of childhood joy, sustainability, and creativity as beautifully as flying kites from bamboo and paper waste. Watching a handmade kite soar across a blue sky is both exhilarating and meditative — it connects you to wind, balance, and imagination. Beyond the fun, kite-making from natural and recycled materials offers lessons in physics, design, and eco-conscious living.
In a world increasingly dominated by disposable plastics, returning to simple crafts like bamboo-and-paper kites feels refreshing and meaningful. These kites don’t just fly — they tell a story about sustainability, craftsmanship, and the timeless bond between humans and nature.
This article explores everything you need to know about creating and enjoying bamboo and paper waste kites — from selecting materials and crafting your frame to understanding flight dynamics and exploring the cultural heritage of kite flying. Whether you’re an educator, hobbyist, parent, or eco-enthusiast, this guide will help you transform everyday waste into something that dances with the wind.
The Art and Heritage of Kite Making
Kite flying has been a part of human culture for thousands of years. Originating in ancient China, kites were first used for military signaling, scientific experiments, and even spiritual ceremonies. Over time, they evolved into a universal symbol of joy and creativity.
Cultural Significance
In Asia, Africa, and Latin America, kite festivals mark celebrations of harvests, religious traditions, and community. For example:
- In Japan, the Tako Age festival celebrates good fortune and courage.
- In India, Makar Sankranti turns skies into vibrant mosaics of color.
- In Thailand, Chula and Pakpao kites represent friendly battles between wind and design.
Each culture brings its own techniques and styles — yet the heart of kite-making remains the same: building something from simple materials and letting the wind take it away.
The Revival of Sustainable Kites
Traditional kites were made from bamboo, silk, or paper — all biodegradable materials. In recent decades, synthetic plastic kites have flooded markets, creating environmental concerns due to non-recyclable waste and harm to wildlife.
By making kites from bamboo and paper waste, you’re not only reviving ancient craftsmanship but also promoting sustainability. Every kite made this way replaces plastic, reduces landfill contribution, and fosters creativity from materials that might otherwise be discarded.
Why Bamboo and Paper Are Ideal for Kite Making
Bamboo and paper might seem fragile at first glance, yet together they create remarkably strong and lightweight structures — perfect for flying.
Bamboo: The Perfect Frame Material
Bamboo’s strength-to-weight ratio makes it an exceptional material for kite frames. It bends without breaking, allowing your kite to flex in the wind while maintaining structure. Moreover, bamboo is renewable and grows quickly, requiring no harmful chemicals or fertilizers.
To make it suitable for kites, bamboo should be dried and cured properly. Thin splits or strips are ideal for lightweight frames. If handled correctly, bamboo outperforms plastic or metal rods in both resilience and environmental safety.
Paper Waste: Giving New Life to Old Materials
Old newspapers, magazine pages, or used wrapping paper are excellent for creating the body of your kite. These materials are light, easy to shape, and fully biodegradable.
When glued or reinforced properly, waste paper can perform surprisingly well in flight. You can even layer different textures — such as tissue paper and recycled office sheets — for durability and aesthetic variety.
By upcycling materials that would otherwise end up as trash, your craft becomes both a creative expression and an environmental act.
Preparing the Materials
Before you begin crafting your bamboo and paper waste kite, gathering and preparing the right materials ensures success.
Materials You’ll Need
- Bamboo sticks (thin, dry, and flexible)
- Old paper (newspaper, gift wrap, brown paper, etc.)
- String or cotton thread for bracing and flying
- Glue or homemade paste (flour-and-water mixture works well)
- Scissors or craft knife
- Ruler and pencil
- Lightweight tape (optional, for reinforcing edges)
- Natural dyes or leftover paints (for decoration)
Eco-Friendly Adhesive Tip
Instead of synthetic glue, try making your own adhesive:
Mix one part flour with one part water and stir over gentle heat until thick. Let it cool before using. This paste is strong enough for paper crafts and completely biodegradable.
Crafting the Bamboo Frame
The frame determines the kite’s shape, strength, and ability to catch the wind.
Choosing a Design
Common kite shapes include:
- Diamond – Classic and easy to control; perfect for beginners.
- Delta – Triangular and aerodynamic; flies well in moderate wind.
- Box kite – Three-dimensional and sturdy; excellent for strong breezes.
- Butterfly or bird-shaped – Decorative and artistic; best for light winds.
Each shape uses the same principles: balance, symmetry, and lightweight materials. For your first bamboo-and-paper kite, a diamond shape is ideal.
Building the Frame
Split bamboo sticks into thin, straight pieces. For a diamond kite, cut one long stick (the spine) and one slightly shorter cross stick.
Tie them together using thread where they intersect — forming a “T” shape. Wrap tightly in a crisscross pattern to keep them secure.
Gently curve the horizontal stick slightly backward. This small arch helps catch wind efficiently, giving your kite lift and stability.
Once tied, run string around the edges of the frame to form the kite’s outline. This string will serve as the skeleton for your paper covering.
Making the Paper Cover
The paper acts as your kite’s “sail,” catching the wind and creating lift.
Laying and Cutting the Paper
Place your frame on a large sheet of recycled paper. Trace around it, leaving a 1–2 cm border. Cut along the outline.
Fold the edges of the paper over the string outline and glue them down. Make sure the paper is stretched but not too tight — it should be smooth with minimal wrinkles.
If your paper is thin, layer two sheets with glue for reinforcement. Avoid overly thick layers that could weigh down your kite.
Reinforcing the Corners
Apply small pieces of tape or extra paper to each corner and joint. These spots experience the most tension during flight.
Use thread or thin string to attach bridle points — small loops through which your main flying line will connect. For most designs, one central bridle point slightly above the cross intersection works well.
Decorating Your Kite
This stage turns your sustainable creation into a work of art. Since you’re using paper waste, decorations can enhance its recycled charm.
Using Natural and Recycled Materials
- Natural dyes from beetroot, turmeric, or spinach create earthy tones.
- Paper scraps or magazine clippings can form colorful patterns or collages.
- Charcoal or pencil drawings add artistic flair.
- Old fabric pieces can be cut into ribbons for tails.
Avoid plastic stickers or glitter, as they can pollute the environment if detached during flight.
Balancing Aesthetics and Function
While creativity is important, avoid heavy paint or thick glue that might unbalance your kite. Keep decorations lightweight and evenly distributed.
Adding the Tail
The tail of a kite adds both stability and beauty. It prevents wobbling by balancing airflow.
Use strips of old newspaper, fabric, or biodegradable ribbon about one meter long. Attach the tail to the bottom tip of the kite’s spine.
If your kite still spins too much during flight, add additional small tails on each corner until it flies smoothly.
Attaching the Bridle and Flying Line
The bridle determines how your kite tilts in the wind.
Tie one end of a short string to the top of the spine and another to the intersection point. Join these two ends with a small loop — this is where you’ll tie your main flying line.
Adjusting the position of this loop changes the kite’s flight angle:
- Moving it upward makes the kite climb higher.
- Moving it downward makes it fly flatter or in lower wind.
Use a light cotton thread or hemp string as your flying line for sustainability and control.
Understanding the Physics of Flight
Kite flying is a fun lesson in STEM (Science, Technology, Engineering, and Mathematics). Understanding the basic forces helps you improve your design.
The Four Forces of Flight
- Lift – Created when wind flows under the kite’s surface, pushing it upward.
- Drag – Resistance caused by air friction; reduced by smooth paper and proper angles.
- Gravity – The force pulling the kite down; countered by lift and light materials.
- Tension – The pull from the string balancing all other forces.
When these forces are in harmony, your bamboo and paper waste kite glides effortlessly.
Experimenting with Wind and Angles
Try flying your kite in various conditions:
- Light winds suit small, lightweight kites.
- Moderate winds favor larger kites with sturdy frames.
- Strong winds require shorter lines and reinforced paper.
Observe how different shapes, tail lengths, or bridle adjustments affect performance. This experimentation makes kite flying both a creative and educational experience.
Safety and Environmental Care
Even sustainable crafts should be practiced responsibly.
- Fly in open spaces away from trees, power lines, or roads.
- Avoid using metallic string or wire.
- Bring all materials back with you — never leave string or paper litter behind.
- Respect wildlife; don’t fly near birds’ nesting areas.
By being mindful, you preserve both your safety and the environment you’re celebrating.
Teaching and Community Value
Making bamboo and paper waste kites is not just a craft — it’s a powerful teaching tool.
For Schools and Families
Children learn about:
- Recycling and sustainability through hands-on creativity.
- Physics by observing how air and balance affect flight.
- Art and design through decoration and pattern-making.
Parents and teachers can turn kite-making sessions into outdoor learning adventures, blending environmental education with fun.
For Communities and Events
Organizing eco-kite festivals or workshops encourages community bonding. Participants can showcase creative designs while raising awareness about reducing plastic use.
Imagine a sky filled with kites made entirely from recycled materials — it’s both a visual spectacle and a message of hope for cleaner skies.
Caring for Your Kite
Proper maintenance ensures your handmade kite lasts longer.
- After each flight, check for tears and mend with leftover paper.
- Store in a dry place to avoid mold or warping.
- Reapply glue or oil lightly to bamboo if it dries out.
When your kite eventually wears out, you can safely compost its materials — leaving no trace behind.
The Joy of Eco-Friendly Flight
Building and flying kites from bamboo and paper waste combines the joy of play with the satisfaction of sustainability. It reminds us that fun doesn’t require new or synthetic materials — only imagination, wind, and care for our planet.
Every kite you craft tells a story: of creativity reborn from waste, of old traditions meeting modern eco-consciousness, and of the shared delight between humans and nature.
So gather your materials, feel the wind on your face, and let your handmade kite rise. Watch it dance among the clouds — a simple symbol of harmony, freedom, and environmental respect.

Elena Mora is a creative educator and eco-craft enthusiast who specializes in bamboo musical instruments and sustainable toys for children. She believes that hands-on learning through play teaches kids about creativity, music, and environmental responsibility.